Getting QuickBooks Migration Failed Unexpectedly Issue? Fix it now!

QuickBooks Migration Failed Unexpectedly error arises when a user tries to transfer their files from one place to another. It can be one SSD to another, an old to a new computer, etc. Whatever the function, the migration process stops when the issue arises, and a dialog box stating failure in migration appears on the screen. This situation prompts users to look for helpful insights so as to rectify the issue instantly and resume working. That is why we have brought a detailed guide on the matter so that you can enjoy a seamless and hassle-free migration.
QuickBooks is an essential accounting tool used by diverse professionals to manage their accounts. While its popularity and functionality are at their peak with every upgrade, users often encounter some issues that may affect their perception of the technology. One such issue arises while migrating QB files from one location to another. QuickBooks Migration Failed Unexpectedly Windows 11 error message can pop up on the screen. It restricts them from moving the files.
Let’s dive into the challenge that users encounter when they move QuickBooks 2023 Migration Failed Unexpectedly and gain in-depth insights about the matter. We’ll jump into the causes and troubleshooting methods to fix the issue. Users can also take the assistance of the QuickBooks Migrator Tool for a seamless procedure.
Are you facing difficulties moving your QuickBooks files from one place to another due to the QB Migration Failed Unexpectedly error? Either read this blog till the end or reach out to our QuickBooks experts at +1- 855 738 2784 for guidance in the right direction

What does QuickBooks Migration Failed Unexpectedly error mean?
Users may change their QuickBooks setup from one computer to another after every few years in search of more space, speed, and other requirements. Therefore, it requires them to move their QuickBooks files as well from the previous to the latest system seamlessly. This migration process can be undertaken manually or through a QuickBooks Data Migration Tool. In any way, if a user encounters an error that says that the migration process has failed suddenly, it restricts the movement of the file and might cause panic among users. It’s because there might be a slight chance of losing your data or being unable to shift and access it on the new system. Therefore, having this guide handy becomes all the more crucial when QuickBooks Not able to migrate to new version.
Recommended To Read – Method Of QuickBooks File Repair
What is the Migration Utility QuickBooks?
For various reasons, QuickBooks users may be prompted to transfer their files from one system to another. However, this process is tedious and may lead to data loss if not given proper attention. Therefore, QuickBooks Desktop Migration Tool is just what you need to carry on with your data migration. It saves your time and manpower and ensures seamless movement from one system to another.
Migration Utility QuickBooks
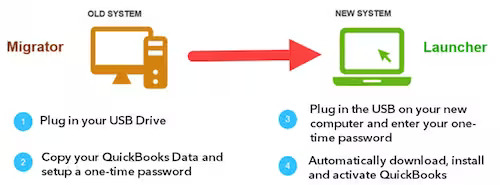
You plug in your USB Drive in the old system (migrator), copy QuickBooks data from the Pro, Premier, and Enterprise versions, and migrate the files by setting a one-time password through the QuickBooks Migrator Tool download. The new system is the launcher, where you plug in the USB, enter the one-time password, and automatically download, install, and activate QuickBooks.
The new migration tool is available to you on your browser, so you need not download QuickBooks Migration Tool and its copy. The need for this new tool is immense to switch from QB Desktop to Online seamlessly, especially with the latest Desktop release. Since more users may find QB Online more fitting to their requirements, the shift from QB Desktop to online may require the QuickBooks Online Migration Tool. This new tool doesn’t need users to have a copy of QB Desktop (any Pro, Premier, Mac, or Enterprise versions) on their system to migrate a QuickBooks Desktop Data File (.qbb, .qbw, .qbm).
Further, the new tool enables QuickBooks migration through the cloud, so users with limited RAM and processors speed can also finish the migration successfully. The only requirements they need are an adequate internet connection and a web browser for QuickBooks Desktop Migration Tool Download.
How does QuickBooks Migrator Tool work?
If you’re wondering why we are touching upon the QuickBooks Migrator Tool, it’s because errors arising in its working and manual migration will bear similar resolutions. So, delving into this tool in-depth will help us clarify the reasons, factors, and symptoms triggering the error and troubleshooting methods for the same.
QuickBooks Migrator Tool
QuickBooks Migration Tool download enables users to move their data with a few clicks from one location to another. Thus, it saves considerable effort, time, and manpower. While using the QuickBooks migration tool, keep the following points in mind:
- Always log into the QuickBooks Migration Tool as an admin user to gain the necessary rights and privileges to make changes.
- You need to form a complex and unique password that is not easy to decode. It will help you unlock the data once you transfer the files to the new computer. Do not forget it, and keep it handy to use when needed while migrating from QuickBooks Desktop to Online.
- Allow the tool the necessary access to copy the data in your system and begin navigating it.
- This tool lets users copy the last three files they accessed to the USB flash drive.
- When you launch the tool, click Start or run for the migration process to begin.
- While the flash drive transfers the data physically, the technical aspect gets covered by QuickBooks data migration services.
- This tool helps you download the most recent and compatible QB version on the new computer and sets up the files accordingly.
- After the migration process ends, the QuickBooks migration tool won’t erase the drive’s data, until formatted. Make sure not to format your flash drive after the QB conversion, so the files don’t get erased.
- It’s crucial not to format your flash drive after the migration, so the files don’t get erased.
- Prior to beginning the migration process, you should be wary of the requirements of the tool so later you don’t see the QuickBooks migration failed unexpectedly error
- Both old and new systems (computers, laptops, etc.) should be connected to the internet, and the network should be robust.
- The USB flash drive you are using should have adequate space for the retrieval and storage of files. The migrator tool requires around 150-250 MB of additional space to download and run correctly.
QuickBooks Migration Tool- Files that Get transferred and others that don’t
While using QuickBooks Desktop data migration download, when the tool doesn’t move some files, a user may feel that it has faced some error. In reality, you need to know that the migration tool faces limitations and doesn’t move all the files. So, knowing this segregation is crucial to ensure you aren’t attacked by the QuickBooks Migration Failed Unexpectedly Issue.
Data that gets copied without hassle-
Users can use QuickBooks Data Migration for a hassle-free shifting of the following files:
- It will know the most compatible QuickBooks version and the details required to initiate and succeed in installing QuickBooks on the new computer.
- Any three files, including the sample files you accessed last on your old computer, will get copied.
- QuickBooks letters, forms, and custom templates will get transferred.
- The reports that are memorized or scheduled with local attachments
- The settings of your printer (PrintEng.ini, wpr.ini, and QBPrint.qbp)
- Spelling checking settings.
- Financial statement designs for both clients and data.
- Cash flow projector.
- Loan Manager.
- Business Planner.
- Advanced reports for the QB Enterprise users.
- Statement writer in QuickBooks Accountant.
Data that doesn’t get copied-
The Migration Tool QuickBooks doesn’t copy the following files:
- If you have a multi-user configuration in QuickBooks on your old computer, it won’t get copied to the new one. You’ll have to start it afresh here.
- The backup files undertaken manually won’t get copied through the Migrator Tool QuickBooks Desktop.
- When you have payroll and payment services linked to the QuickBooks application, it’s critical to log them again into the new computer to maintain data integrity and protection of the sensitive data.
- Since QuickBooks Data Migration Tool copies only the last 3 files accessed, shift the others by uninstalling Intuit Data Protect on the previous computer. Then, proceed with installing it on the new computer. After finishing its setup, you can migrate the rest of the company files.
- The new QuickBooks Migration Tool will not convert US multi-currency files properly from QB Desktop to Online.
- Similarly, it won’t cross-convert US-Desktop files to non-US QBO files.
Download QuickBooks Migrator Tool
Accomplish the following procedure while downloading this tool as follows:
- Through a QB-supported web browser (preferably Internet Explorer or Google Chrome), sign into QuickBooks Online.
- Now, locate the exported data from QBO to QBDT or vice-versa through Intuit.
- Move to the Export Overview screen and hit it to start.
- Hit the Download tool button in QuickBooks to download the Migration Tool.
- Wait for the installation to finish, and then launch the installer and run it.
Migration Process Using QB Migration Tool
Now that you know where to download this tool from let’s know how to migrate from QuickBooks Desktop to Online
- When the Migration Tool’s version is for Pro, Premier, Mac, or Enterprise, access the appropriate tool’s version from Intuit’s webpage that enables moving files to QB online.
- Here, click the green colored Get Started icon.
- The next step is to follow the sequence below to upload the company files:
- When you access the tool, you will find a file icon in the menu bar in the upper-left corner.
- Here, log in to the Intuit account or create a new one.
- Now, hit the Temporary files option.
- Choose the option that says Upload Files to browse and select the desktop file to migrate QuickBooks Desktop to online (.qbw or .qbb).
- After the company file uploads, exit the pop-up.
- Hit Refresh to see the uploaded company file.
- Enter the uploaded company file as the company admin.
- The most current Desktop version will have the updated desktop company file.
- Now, you will get asked whether you have an existing QuickBooks Online account or if you’d like to create one. Connect the appropriate account.
- This tool will begin migrating from QuickBooks Desktop to QuickBooks Online immediately.
- The session will end after the migration procedure finishes.
- Now, you should be ready to log in to your QB Online account and check the transferred files and data. Do remember the differences in transferring some features and files, as stated earlier.
Next, let’s dive into how to migrate QuickBooks to new computer.
Procedure to follow on the old computer
Execute the following steps on your old computer to initiate migrating QuickBooks Desktop to Online:
Procedure to follow while migration
- Begin by inserting the flash drive with adequate space in the old computer.
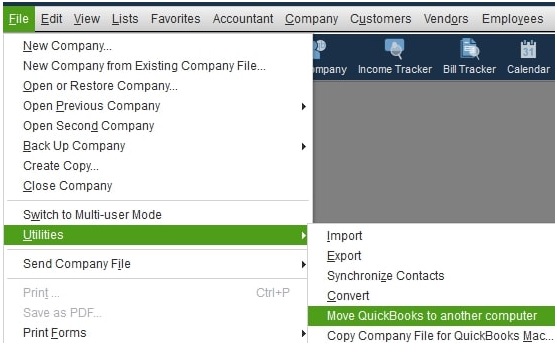
- Tap the QuickBooks icon and move the cursor to the file menu in the application.
- From the drop-down menu, choose Utilities.
- When the utility option window appears, choose the option stating Move QuickBooks to another computer.
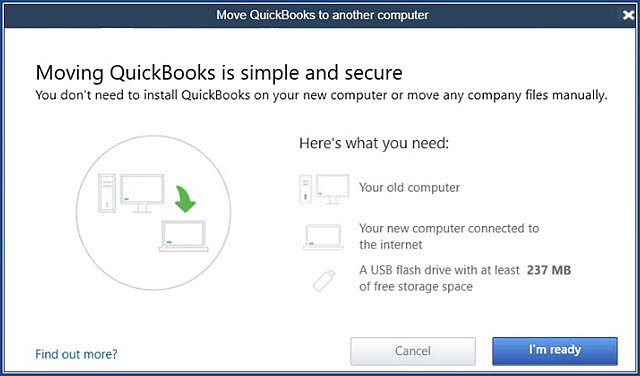
- Further, hit the option I am ready and form a complex and strong password.
- Follow the instructions on the screen, choose the USB you plugged in, and wait for the files to copy.
Read Also – Fix QuickBooks Error 1402
Procedure to follow on the new computer
Once the steps on how to download QuickBooks on another computer gets accomplished, perform the following actions:
- Take the USB from the old system and plug it into the new system.
- The Migration tool will not begin automatically. Instead, you need to open the flash drive on the new computer and double-click the file named Move_QuickBooks.bat file.
- The password you created while copying the files to the USB should get entered at this stage.
- Once these steps are done, and on-screen instructions followed, you just have to wait for the files to migrate from QuickBooks Desktop to QuickBooks Online on the new system.
Additional considerations in the Migration Process:
Take care of the following points while QuickBooks Desktop to Online Migration is in the process:
- Once you move to another computer, you will need to register QuickBooks again. For this, you can go to the Help menu and re-register QuickBooks by entering the required information. If you don’t remember your license data, you can press the F2 key on your QuickBooks Desktop to access the Product Information window and search for the license details.
- Enter your payroll and payment services information in the new system to start afresh and ensure no data leaks or security attacks happen.
- Install Intuit Data Protect on the new system, as it doesn’t get copied with the QuickBooks Desktop Migration Tool.
- Ensure to back up your files on the new computer as well and configure these settings for future use.
- Create a backup schedule for regular backups that prevent data loss and security risks.
- Ensure to copy the remaining files (other than the three accessed by the migration tool) manually or through IDP.
- Re-configure the multi-user mode settings if they are necessary, as they do not get copied from the old to the new system.
Steps to transfer the data manually
Although manual data transfer is time-consuming and challenging, the manual steps to migrate from QuickBooks Desktop to Online are as follows:
- Begin by creating the backup of your QuickBooks files on the old computer.
- Follow it by uninstalling QuickBooks from the old computer.
- Now, on your new computer, start installing QuickBooks.
- End by restoring the QuickBooks backup on your new computer that you created in the old system.
In the above section, we have understood how the QuickBooks Migrator tool works, what is the migration utility in QuickBooks, its requirements, and other information. Now it’s time for us to get back to the issues that appear during migration, which may happen manually or using the migration tool as well.
Triggers of QuickBooks Migration Failed Unexpectedly error
Now that we know what the error is, it’s critical to be aware of the factors that lead the user to it. Even though QuickBooks is an excellent technical platform, QuickBooks not able to migrate to new version is a common problem noticed in it. Here are some common reasons you can face issues migrating your QB to a new version.
Outdated Windows

Outdated Windows
Whether you are running QuickBooks on Windows 10, 11, 7, or 8, if its version isn’t updated and you are continuously relying on the outdated one, you are sure to face Unexpectedly Failed Migration Errors.
Issues with the Migrator Tool
If you’re using QuickBooks Migration Tool for your files to migrate to QuickBooks Online, errors in its processing or anything might be the reason why QuickBooks not able to migrate to new version.
Unsupportive QuickBooks version
If the QuickBooks version on your new computer is not supportive of your existing files, the migration process will not finish successfully or yield adequate results.
Windows OS Misconfiguration
If the Windows Operating system is misconfigured, issues might arise during migration, and it may fail.
Corrupted OS files
When the files of your operating system are corrupted, you might face the QuickBooks Migration Failed Unexpectedly error.
Damaged Company File Folder
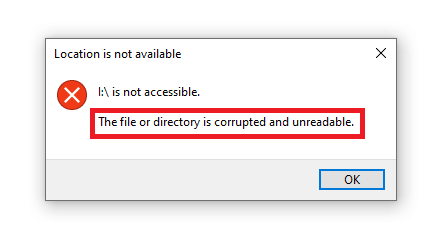
Damaged Company File Folder
If the folder containing the QB files is corrupted or the folder path is broken, you can face issues while moving your company data.
Essential files get deleted
While trying to migrate QuickBooks Online to Desktop, when the crucial files go missing, corrupt, or accidentally deleted, the procedure will fail.
Compatibility issues
It is quite possible for you to face issues in compatibility between the Migrator Tool, QuickBooks Desktop version, and the operating system if you have updated any one of them and not the others. It may lead to the QuickBooks Migrator Tool Not Working Error.
Malware or Virus Infections

Malware or Virus Infections
QuickBooks users may also face attacks by malware or virus, corrupting essential files and negatively affecting the system’s operations.
Modifications in Accessing QB
Users may face trouble accessing the QuickBooks applications due to changed rights or no more admin user access. This may further lead to the QuickBooks Migration Tool Not working issue.
Problems with the Recent Windows Update
Sometimes after updating your Windows OS to the recent release, issues can occur that prevent QuickBooks from running correctly. This leads to the QuickBooks migration failure and can cause issues with the conversion process.
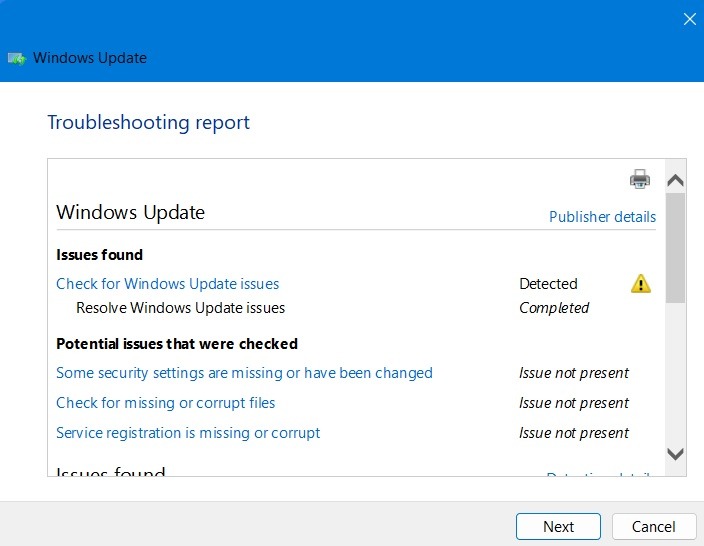
Problems with the Recent Windows Update
Thus, all or a few of these triggers can result in an error during QuickBooks Migration, causing it to fail. In such situations, QuickBooks users must undertake the following troubleshooting solutions.
Resolution Methods for QuickBooks Migration Failure
When users encounter the QuickBooks Migration Failed Unexpectedly or QuickBooks Migration Tool Not Working error, they should perform the following troubleshooting solutions-
Note – Make sure to take a backup of your essential data before fixing the migration tool failure issues. This will help prevent any accidental data loss or data mismatch post the conversion process.
Fix #1: Moving the company file folder to another location
Manually locate the QB company file in the QB installation folder and fix the QB Migration Tool Not Working issue:
- Begin by copying the backup files onto the new computer.
- Now, open the folder and find the backup file.
- Access the Restored_CompanyName_Files folder.
- Right-click and choose the Copy option on the folder name.
- Now, paste this file to the desired location.
- The files you will need to copy and paste are as follows:
- Cash flow Projector
- Financial Statement Designer
- QB Letters
- QB Templates
- Printer Settings
Fix #2: Restore Company Files
You can try shifting your QuickBooks Desktop manually to the new location and restoring your backup files. You cannot move your files manually from one computer to another, but you can move your QuickBooks Desktop between SSDs as follows:
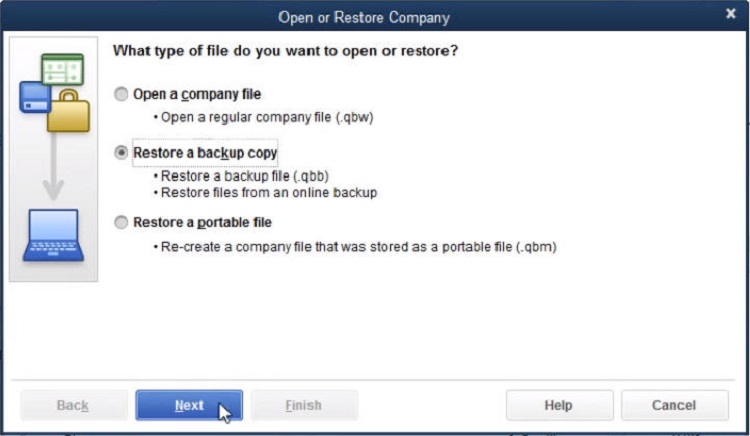
Restore Company Files
- Install QB Desktop on your new system.
- Form backup files on the old computer as follows:
- Initially, switch to the Single-user mode.
- Then, in the QB Desktop, go to the file menu.
- Find the Backup Company option and proceed with clicking Create Local Backup.
- Once you choose the local backup of files, browse, and hit the folder where you wish to save these files.
- Click OK > Save > Next > Finish.
- Copy the backup files to a new computer.
- Launch the QB app on the new system.
- Restore the backup file and follow the prompts on the screen.
- Complete restoration and download the latest tax tables.
Fix #3: Repair the Program Files
The repair tool for QB in Windows Control Panel helps users fix their program files. Instead of reducing the workload by uninstalling the app, choose to hit the Repair option. Do it as follows:
- Use the Admin Windows account to sign in to the Windows.
- Launch Control Panel from the Desktop or Start menu.
- Hit the Programs and Features or the Apps option.
- Locate QuickBooks Migrator Tool in the apps list.
- Choose Uninstall/ Change option.
- Hit the Repair option on the screen.
- Follow the prompts on the screen to finish the repair process.
- Now, attempt to migrate the data seamlessly.
Fix #4: Update Windows Operating System
An outdated, incompatible, or misconfigured Windows Operating System will not let QuickBooks Migration succeed. Therefore, update your Windows OS as follows:
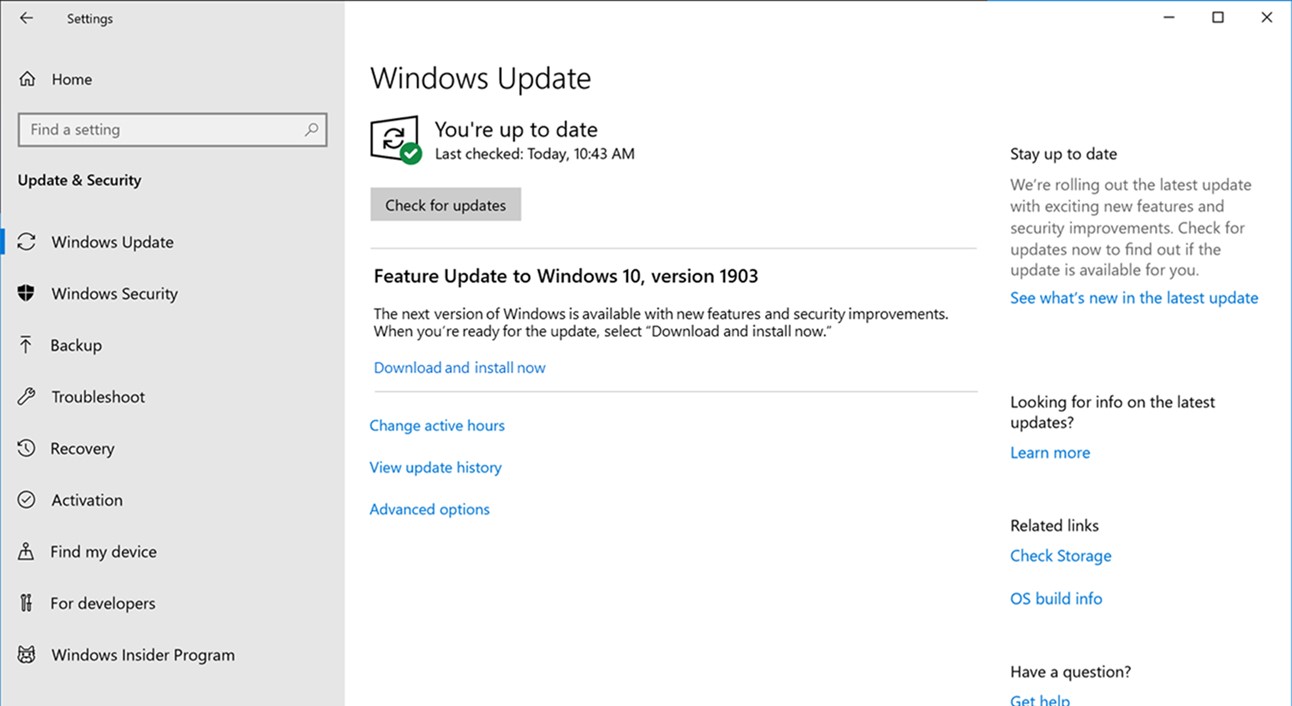
Update Windows
- Go to the Start tab on your Desktop.
- From the menu, choose Settings.
- Now, search in the window that opens and find Windows Update.
- Once you locate this option, click it and get the Windows updates.
- Open your QuickBooks Desktop again to start the migration process once the Windows update process has finished and you have rebooted the system.
You May Also Like To Read – What Is QuickBooks Error 179
Fix # 5: Troubleshoot Compatibility Issues with QuickBooks
When QuickBooks Migration Fails due to compatibility issues in the application, do as follows:
- Locate the QuickBooks application icon and right-click on it. Further, hit the Properties and ‘Open File Location’ options from the list.
- When the properties dialog box appears, go to the Compatibility tab.
- In the “Run this program in the compatibility window for” drop-down, choose the Windows version.
- Hit Apply and OK to save the changes.
Fix #6: App Compatibility Troubleshooter Utility
Run the compatibility troubleshooter in Windows as follows:
- Launch the Control Panel from the Start menu or Desktop.
- In the Control Panel window, choose the Programs and Features section.
- Here, you need to hit the “Run programs made for previous Windows versions.”
- Further, click the Windows Program Compatibility troubleshooter.
- Now, click the Next or advanced button and choose QuickBooks from the list of available programs.
- You will see the compatibility troubleshooter run and list the issues on the screen about the application.
- After all the issues get diagnosed, hit Next to let the repair process begin.
Fix #7: Update QuickBooks to the Latest Release
Sometimes, using an outdated or previous QuickBooks version on one computer and a new one on the other may also lead to this issue. Therefore, undertake the updation process on one of the computers’ QB applications as follows:

Get updates QuickBooks desktop
- You will find the Update QuickBooks Desktop option in the Help menu of the application.
- Hit the Update Now option and proceed with choosing the Get Updates option.
- Now, exit and open the QuickBooks application, install the updates if prompted, and restart the computer once the updates are installed.
- If you’re facing troubles updating QuickBooks, end these processes in the Task Manager (Ctrl + Shift + Esc) and re-run the updation process:
- Qbw32.exe
- QBCFMonitorService.exe
- Qbupdate.exe
- QBDBMgrn.exe
- QBMapi32.exe
Fix #8: Move the QuickBooks Data Folder
If you can’t or don’t want to create a copy of the backup file, move the entire QB data folder. The instructions required for this method to resolve QuickBooks Migration Failed Unexpectedly error are as follows:
- Begin by launching the QuickBooks application and searching for the company file.
- Visit the Product Information screen by pressing the F2 key on the keyboard.
- Here, move to the File Information section.
- Now, find the location of the company file.
- Further, go to the Start icon and look for File Explorer.
- Once found, open the company file folder.
- Right-click the folder name and choose to copy. Alternatively, hit Ctrl + C.
- Now, paste the folder into the required location (Ctrl + V).
Fix #9: Utilize Intuit Data Protect Plan
Intuit Data Protect plan takes backup of your entire PC, a single file, or non-QuickBooks-related files. Based on the various data protection plans, these things may vary. You can fix the Migration Failed Unexpectedly issue using this as follows:
- Begin by taking the backup of your QuickBooks company files on your old computer.
- Now, you need to sign in to Intuit Data Protect on your new computer with the login credentials of your old computer.
- Move to the File tab in the QB application.
- Hit the Backup Company option in the opened window.
- Choose the Set-up or Activate Online backup option.
- Now, choose the QuickBooks company file, and then, Continue.
- Mark the checkbox against the Back up local selected documents option.
- Now, hit Continue and create a backup. The files you will see in these folders are as follows:
- Business Planner Files
- Cash Flow Projector Files
- Loan Manager Files
- Logos and Images files
- Network data Files
- Transaction Log Files
Fix #10: Eliminate any third-party backup app
If you think any unwanted third-party app is interfering with the QuickBooks Migration procedure, remove it from the computer to resume QBDT Migration. Follow the procedure as mentioned below:
- In the Edit menu, hit the Preferences option so that a Preferences window can open before removing an integrated program in QuickBooks.
- Load your Company Preferences by choosing the Integrated Applications option from the list on the left side of the Windows. Now, choose the Company preferences tab.
- Delete the checkmark against the integrated program you want to uninstall. Once you uncheck an application, it won’t be able to access your QB information and company files or connect with the application.
Thus, you can successfully remove the third-party apps interfering with your migration procedure.
Fix #11: Uninstall any pending QB maintenance release update
Before proceeding with this solution, save your pending work and close the QB program.
- Firstly, set Windows to display the hidden data and folders to view the Program Data directory.
- In the Update QuickBooks Desktop window of the Options tab, you will find the Download location.
- Locate the EPatch and New Features directories after arriving at the download location. It should match the dates when QuickBooks downloaded the last update.
- Select All to highlight the contents in the EPatch directory.
- Now, hit Delete to erase all the content in this directory and then close it.
- Now, go to the New Features directory, highlight the content, and hit Delete to remove everything. Then, exit it.
- Now, you have removed the Windows update maintenance release. You can proceed by exiting the Windows Explorer.
Fix #12: Restore to the Previous Windows Version by Going Back to an Earlier Build
If you have recently downloaded Windows updates and the QuickBooks migration failed error occurred post that, you might try restoring your Windows to the previous version.
- Click on the Windows icon and go to the Settings tab to access the Update and Security menu.
- From the left pane, find the Recovery tab, and once three options appear on your screen, select the Go Back to an Earlier Build option.
- Click Get Started and perform the Windows restoration process, followed by reinstalling the migrator tool and checking the status of the QuickBooks migrator tool not working error.
Fix #13: Setup your QB Online Cloud Profile to Export Data to QuickBooks Online
You can use this additional method to move your QuickBooks Desktop data to QuickBooks Online. Follow the procedure given below to log in to your cloud profile for the data migration process –
- Log in to your QuickBooks Desktop and move to the Company menu to see the Export option at the bottom of the screen.
- Select the Export Company File to QB Online option and log in to your cloud profile.
- If you don’t already have a cloud profile, set up the profile and enter the required credentials.
- Select the destination where you want to migrate the company file and sign in to QB Online accountant.
- Checkmark the Move my Stock using FIFO option and select the Starting Date to migrate the data.
- Hit Continue to initiate the process, and once it ends, check if all your data is migrated successfully.
Bottom Line
This in-depth guide about the QuickBooks Migration Failed Unexpectedly error will let you know of all the nooks and crannies about the issue. Follow all these steps to get rid of the error. If these steps don’t work or you get stuck somewhere, contact our QB experts or desktop migration services at +1- 855 738 2784 and receive professional assistance.
FAQs
What to do when the QB Migrator Tool stops working unexpectedly?
In situations where the Migrator Tool Stops Working Suddenly, you can proceed as follows:
- Ensure the tool is installed on the new computer.
- Make sure the tool, as well as the QuickBooks Desktop app, are up-to-date. Check by opening the QB file and seeing the data status at the bottom.
- Keep all the files in the same location as when you backed them up. If not, copy and paste them into one location.
How to use Migration Tool in QB application?
- Choose the Utility section in the File menu of QuickBooks to move it from one location to another.
- Hit the I’m ready option and enter your one-time password.
- Select the USB flash disc to use, follow the steps, and wait for the files to copy.
Is it Necessary to Upgrade your QuickBooks Company File after Migrating to a New Computer?
No, you do not need to upgrade your QuickBooks company file post the migration process. This is because the same QB version will be installed on your system after you are done migrating your data. Hence, upgrading the QB file is not required.
Related Posts –
Quick Ways to Get Rid of QuickBooks Error 6190 and 816
Learn Effective Ways to Convert QuickBooks Desktop to Online
Convert QuickBooks Online to Desktop in Easy Steps
How to Fix QuickBooks Error H202 in Multi-User Mode Swiftly
QuickBooks Won’t Open? Here’s the Key to Solve it!
QBDBMgrN Not Running on This Computer Error | Let’s Fix it!